Import
and Use of your Controlled Vocabulary Keyword Catalog (CVKC)
with IDimager 5.0
[please note] IDimager version 4.0 and 5 ship with a sample of the Controlled Vocabulary Keyword Catalog already installed. When you import the full version of the CVKC , the database will overlay/merge this with the earlier version of the file already in the catalog. The labels are updated if changed in the new file, and new labels found in the new import file are created in the hierarchy. Any new terms which you added to your version of the sample catalog will remain.
What is the Controlled Vocabulary Keyword Catalog or CVKC? If you are not familiar with this useful tool, you might want to first visit the product page for information regarding the IDimager Version of the CVKC.
The following topics are covered on this help page–clicking on the link will take you to that section of the page. For other general questions see the CVKC-FAQ.
Installing the CVKC
files into IDimager v5
Installing the CVKC files into IDimager v4
Applying Keyword Tags from the
CVKC using IDimager
Adding Additional Keywords to the
IDimager Controlled Vocabulary
Installing CVKC Files into IDimager 5
Launch IDimager after first decompressing / unzipping the IDimager CVKC file you downloaded from the Controlled Vocabulary website (See the UnZipping page if you are not familar with how to open or extract a Zip file). The actual file with the information you need ends in a .utf8 extension. Note the location of this file on your hard drive for later, or move it to the default folder that IDimager will open
Windows XP
…
\IDimager Products\IDimager\Tools\controlledvocs
Windows 7
[HD]:\Program Files (x86)\IDimager Products\IDimager\Tools\controlledvocs
when you import the
CVKC.
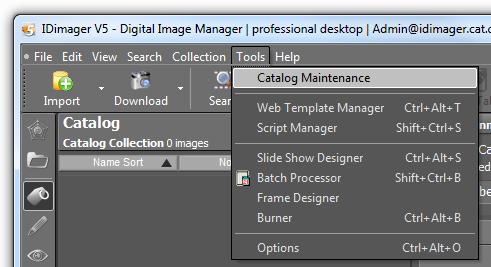
From the Tools menu in IDimager v5 select Catalog Maintenance as highlighted in the image below.
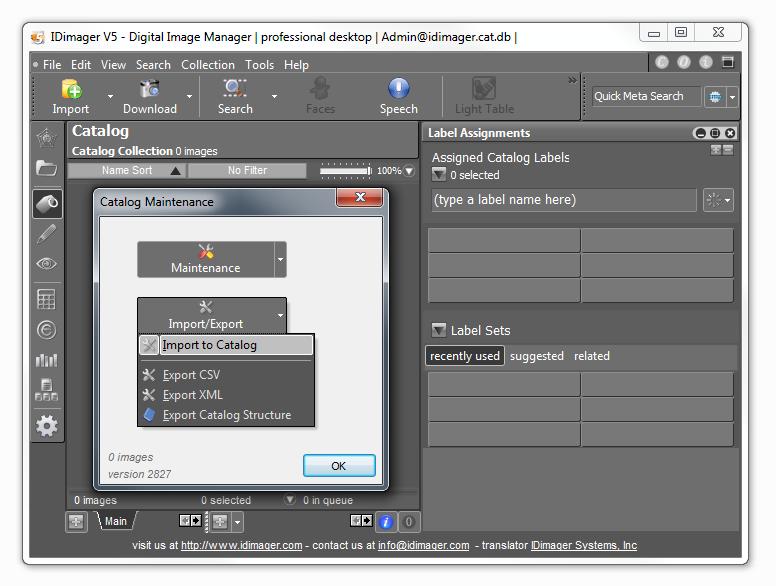
From the IDimager Catalog Maintenance dialogue, click on the white downward pointing arrow to the right of the Import/Export icon, and from the resulting pop-up menu choose Import to Catalog and click the OK button.
In the resulting IDimager Catalog Import Module choose Import Vocabularies, the last item to the right in the tab of sub menu items; and from the resulting pop-up menu choose Import from Controlled Vocabulary.com. This will open a folder within the IDimager program on your local hard drive as noted above.

This action will open a file navigation dialog labeled Select ControlledVocabulary file. With version 5 (actually for v 4.2 or later) this will default to the…\IDimager Products\IDimager\Tools\controlledvocs folder. If you left the folder on the desktop, you will need to go to that level to locate the folder you downloaded. Important: please note that the "idimager-cvkc-demov3.utf8" is already in this location. Do not mistake this as being the file you need to import.
If you had already moved the downloaded file to this location, then simply select the file labeled cvkc-IDimager4.utf8 and then click on the Open button in the lower right (alternately you can just double click on the file). Note, by default, the idimager-cvkc-demo3.utf8 file will already be in this same folder. If you only see that file, then you will have to navigate to the location where you had extracted the compressed file (Zip or Stuffit).
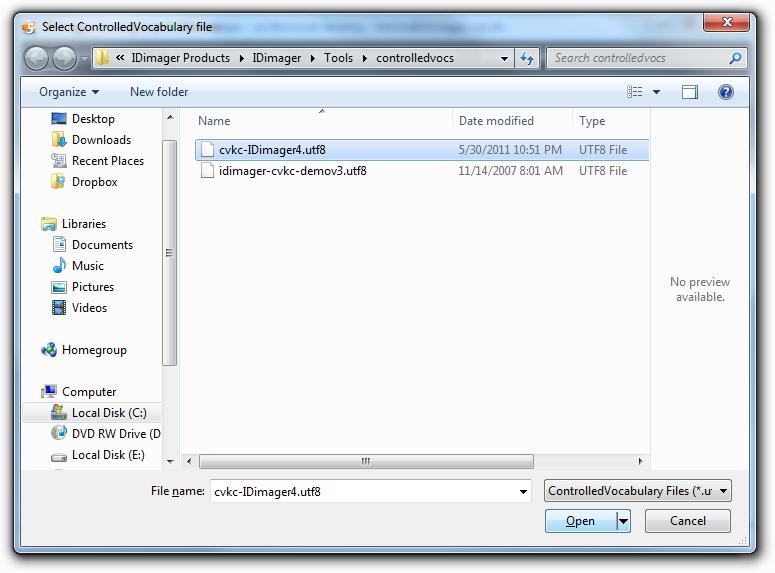
With the .utf8 file selected, click on the Open button to continue.
After choosing the file, you'll be presented with a confirmation dialogue, asking if you are sure that you want to start the import for the Controlled Vocabulary file . You should be greeted with a confirmation dialog asking, Are you sure you want to start the import for ControlledVocabulary.com file [path noted to the cvkc vocabulary file] now (check to be sure that the specific location of the file is the one you wanted to select).
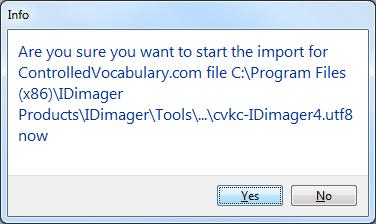
Click on the Yes button to start the import process.
This will take some time to import, however there is a progress bar that will give you a rough estimate of how much time is remaining for the import to complete. Please allow the import to complete before attempting to proceed. For the IDimager Personal and IDimager Pro Desktop versions it may take up to 5 to 10 minutes on a reasonably new machine to import. For the IDimager Pro SQLSERVER it should only take about 5 minutes before the import is completed (the exact time needed is a function of your computer operating system, processor and RAM, so it's not possible to give you a better idea than this).
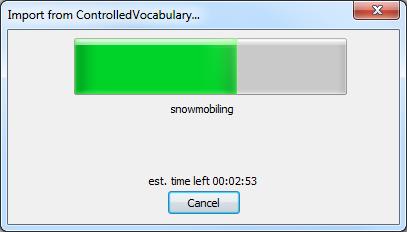
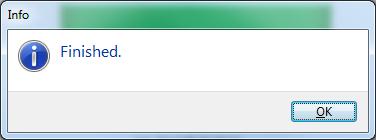
During this step the import feature creates a new top catalog category named ControlledVocabulary.com and the hierarchical structure of the file is imported as a hierarchical label structure. At the end of the process you'll see a note that IDimager is rebuilding hierarchy structure followed by a final Info dialogue noting that the process is Finished. Just click on the OK button to end the process.
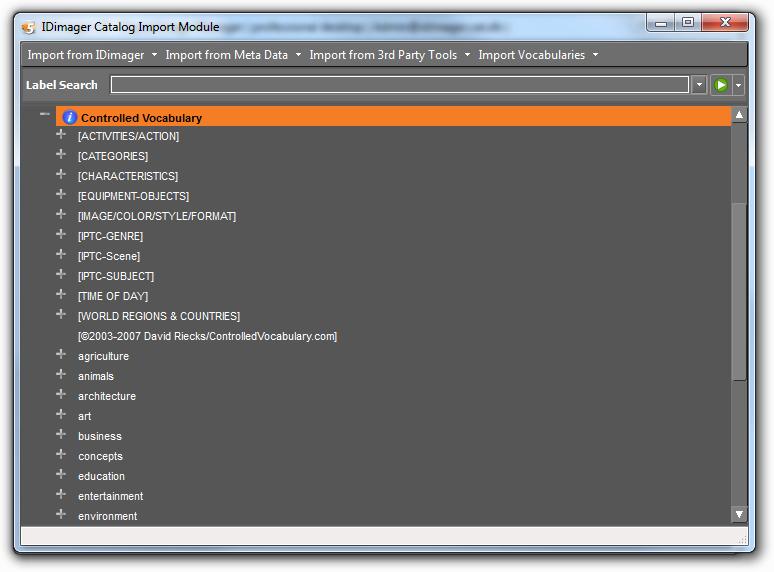
After the import has finished you should now see the ControlledVocabulary.com set of terms in the Catalog Labels section of the IDimager Catalog Import Module. If you expand the Catalog Labels In the IDimager Catalog Import Module (the blue items), you'll see a new item at the bottom labeled Controlled Vocabulary with a white lower case i in a blue circle. Clicking on that "info" button will take you to the CVKC product page for IDimager. Clicking on the Plus sign + will expand out the hierarchies available within the Controlled Vocabulary Keyword Catalog. Closing that dialogue will return you to the main IDimager window, with the Catalog Maintenance dialogue window still open. Click on the OK button to return to the main application.
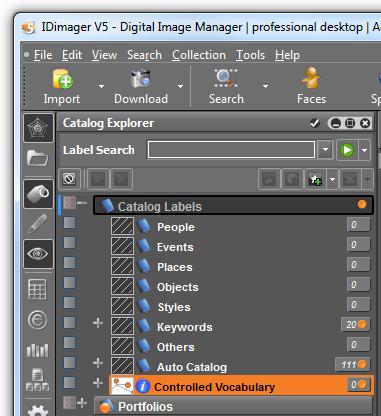
The Controlled Vocabulary terms will also be visible in the Label
Assignments section
of IDimager5. In IDimager 4.2 and later, it will be listed in the Catalog
Explorer sect
Applying Keywords from the CVKC using IDimager
Even though keywords are just a single entry field in the metadata entry panels, they are of major importance since they reflect the content of the image in a way that you as the photographer or the photograph manager want them to be. Keywords are also important whenever you exchange inmages with another party that uses applications that understand keywords.
Keywords are stored in IPTC metadata as a flattened list of entries. IDimager uses catalog labels to represent keywords allowing you to organize them in a hierarchical manner. Catalog labels and keywords are exchangeable, so it is simpler to consider IDimager's catalog labels as keywords. In this manner it is not necessary for you to enter keywords in the keyword fields with IDimager. Simply use the catalog labels as IDimager will make sure that catalog labels are copied to the IPTC Keywords field when you write out the catalog information to your image's metadata.
IDimager keeps metadata keywords and catalog labels separated. However, it is possible to edit meta keywords directly in the Image Details. The image details can be opened by either clicking the pen icon in the left explorer bar or by pressing Alt+Enter on one or more selected thumbs. The tab sheet General contains the meta keywords property. While editing a keyword, IDimager will auto-complete the keyword by looking it up in the catalog labels. When pressing Alt+Down you get a list of all catalog label matching the entered text.
Please note that IDimager does support the use of synonyms. While, they are not visible in the Catalog Explorer they are being used to perform catalog label/keyword searches. For example when you search for MDX you will get Europe >> United Kingdom >> Middlesex. The synonyms are not visualized themselves because they are not preferred so they instead link you directly to the preferred entry. You can see the synonyms if you open a catalog label's properties using a right click -> Edit. For more details search the IDimager help file for "Synonyms" (without the quotes).
In the main IDimager window, you should be able to see the "Catalog Assignment" window (orange label bar) at the left. If it's not visible, you can click on the Spider-web like icon in the far left explorer bar. Scroll down until you see the Catalog Labels section. Click on the + sign at the left and you should now see a section titled ControlledVocabulary.com. If you click on the + sign to the left of that label you will see the rest of the hierarchical structure. Clicking on the + signs to the left of any of the sublevels will reveal additional sublevels until you reach the narrowest subject matter term.When expanded, the full hierarchy should appear similar to the image below.
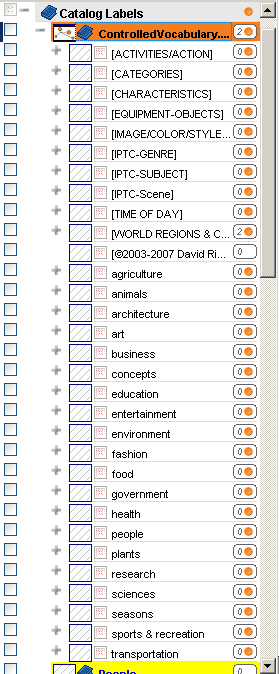
Make selections just as you do anything else in Windows. To select several contiguous images, click on the first image, then hold the Shift key down before hitting the last in the series. To select images that are not located next to each other, simply click on the first, and then hold the Ctrl key down as you click on each of the other images.
There are two ways to find appropriate keywords in IDimager. You can expand the hierarchy by clicking on the + sign at the left edge of each term to reveal the narrower terms, "drilling down" through the various levels till you find the term you need. The simpler way is to just type the term you are interested in finding into the Label Search field (indicated below by the large red arrow below).
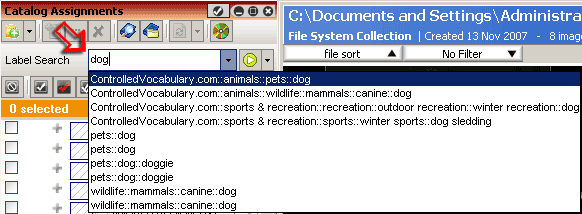
If you type a term into this field, you will see various paths that correspond to that term appear just below where you are typing. You can use your mouse, or arrow keys to select one of these paths. Once selected that path appears in the Label Search field. If you press the Enter key, or click on the white triangle inside the lime green circle to the left of the Label Search field, you'll find that you are taken to that part of the hierarchy. A vertical black bar will appear next to the term you have typed in (noted by red arrow below), ready for you to assign it as a Catalog Label / Keyword.
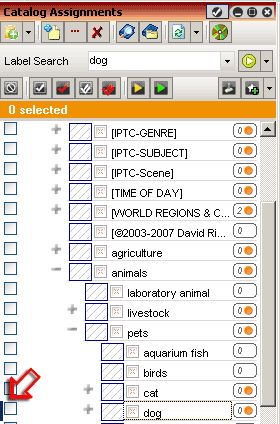
You are now ready to use the CVKC library by assigning images to the CV-catalog labels. This can be done by selecting any number of thumbs and pressing the F6 or Ctrl+F6 buttons. You can also drag the selected thumbs to the label in the hierarchy and the Catalog Label will be assigned to those images.
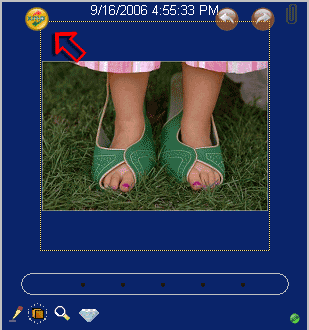
After assigning Catalog Labels you can write them as XMP/IPTC keywords by syncing the catalog to the image. This can be done by either using the hover sync icon in the upper left corner of thumbnails (noted by the red arrow in the image below), or by pressing Ctrl+F12. During the sync process, all assigned catalog labels will be written as meta keywords.
Before you start working with keywords in the first place, it is recommended that you first decide how you want these keywords to be constructed. Keywords in metadata are single entries, meaning there is no hierarchical dependency between the keywords. For instance, if you have a catalog label structure "Animals -> Pets -> Dog -> german shepherd" then the metadata keywords don't allow you to store this in a hierarchical order as one keyword. With IDimager you have several options on how you'd like to store these keywords. You can store them as a single keyword (german shepherd) or as dotted keywords: Animals.Pets.Dog.german shepherd. Both options have their pros and cons. The first method just lacks information, but adds the most relevant keyword without redundancy. The dotted keyword method separates each hierarchical level by a "dot", meaning you can no longer use "dots" in your keywords/catalog labels.
By default IDimager is configured to write catalog labels as single node (most significant). If you decide to use dotted keywords, then you'll have to change this in the preferences. From the main menu select "Tools | Options" and then open tab sheet "XMP Sync Settings". This options panel may look overwhelming at first, but for now only the fields "Write dotted name keywords" and "Map dotted keywords" are relevant. This first option will make sure that catalog labels are written as dotted keywords. The second option is to make sure that IDimager also reads keywords in dotted notation to create catalog labels from them. It is recommended that you change both at the same time to ensure interoperability.
Adding New Keywords to the Controlled Vocabulary in IDimager:
Here are a few suggestions to get you started when adding new keywords to the Controlled Vocabulary in IDimager.
[this information is still being prepared]
That's really all it takes. If you have spent any amount of time adding terms, you probably will want to be sure to back-up your work, by exporting the catalog labels file, and storing this text file in a safe place (offsite or online). You will find the options for exporting and backing up under the Catalog Manger link beneath the Tools menu. I am working on a document that covers the editing of plain text versions of the CVKC. If you are interested in previewing a copy, send an email to me using the link on the contact page.
Other Notes
[Additional instructions on how to use IDimager and the CVKC are still being developed. Screencasts may be developed in the future. Check the Download page to see when these become available.]
Please note that your username and password will remain active for the period in question. You are welcome to check back from time to time, or you may wish to join the Controlled Vocabulary "group" by sending a note to (controlledvocabulary-subscribe@yahoogroups.com), or going to the bottom of the main page on the Controlled Vocabulary site at (http://ControlledVocabulary.com/). This list is primarily for the discussion of the use of controlled vocabulary in building and managing image databases, and dealing with metadata for image collections, but I will also post notices of catalog updates in addition to sending you an email.
If you are having problems with the underlying IDimager program, check out the IDimager Support Forums.
Please note that use of the Controlled Vocabulary Keyword catalog is subject to the End-User License Agreement ("EULA"), and that by downloading this software you agree to be bound by those terms and conditions.
